Altoroj Webapp Setup
AltoroJ WebApp for Security Scanning
AltoroJ
AltoroJ is a Java WebApp that is purposely configured with many known security vulnerabilities. I needed to use the the tool I work on for running automated webapp scanning.
Installation
JDK 1.8
It requires JDK 1.8, Apache Tomcat 7 and Eclipse IDE for Enterprise Java and Web Developers with Gradle’s Buildship Eclipse plug-in for compiling it. I am using Ubuntu 20.4.
vivek@vivek-ub18:~$ sudo apt-get install openjdk-8-jdk
vivek@vivek-ub18:~$ which java
/usr/bin/java
vivek@vivek-ub18:~$ java -showversion
openjdk version "1.8.0_292"
OpenJDK Runtime Environment (build 1.8.0_292-8u292-b10-0ubuntu1~20.04-b10)
OpenJDK 64-Bit Server VM (build 25.292-b10, mixed mode)
Apache Tomcat 7
Download Apache Tomcat 7 and simply extract it somewhere (I chose home directory) - this will be the installation directory we will refer to later when configurin Eclipse
vivek@vivek-ub18:~$ wget https://apache.osuosl.org/tomcat/tomcat-7/v7.0.109/bin/apache-tomcat-7.0.109.tar.gz
vivek@vivek-ub18:~$ tar xvzf apache-tomcat-7.0.109.tar.gz
Eclipse IDE for Enterprise Java and Web Developers
Installation
I used the latest Eclipse IDE for Enterprise Java and Web Developers package from here. Make sure you choose the for Enterprise Java and Web Developers as that contains allows one to use configure and run the webapp on Apache Tomcat server later on.
vivek@vivek-ub18:~$ wget https://eclipse.mirror.rafal.ca/technology/epp/downloads/release/2021-03/R/eclipse-jee-2021-03-R-linux-gtk-x86_64.tar.gz
vivek@vivek-ub18:~$ tar xvzf eclipse-jee-2021-03-R-linux-gtk-x86_64.tar.gz
One can also choose the Eclipse installer package which will allow you to do the same.
In case, you already have or choose the regular Eclipse for Java Developers then you can goto
Eclipse Marketplace -> Eclipse Enterprise Java and Web Developer Tools 3.16 to install the Java EE Developer Tools That should allow you to later configure Apache Tomcat 7 for running AltoroJ.
Point to Open JDK 1.8
The default JRE for my version of eclipse was 15 - in order to use it for AltoroJ we need to change it and point it to Open JDK 1.8 that we just installed. Go to Window -> Preferences
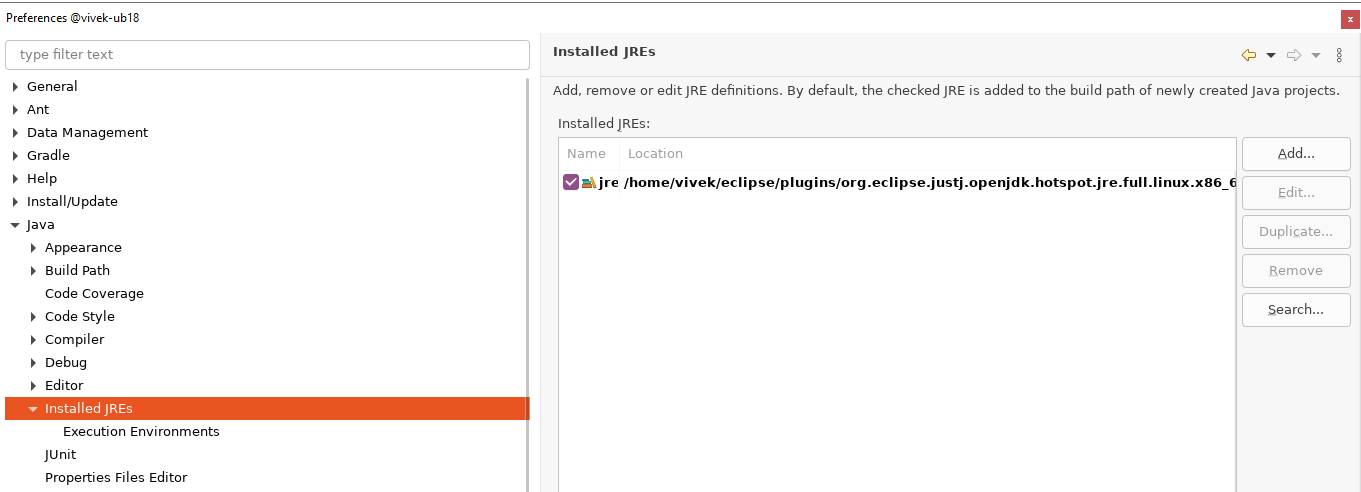
- On the right hand side click Add button
- choose to add Standard VM
- click Directory and point to
usrdirectory where Open JDK 1.8 was previously installed. Eclipse should find automatically find the JVM and add the required JARs as shown below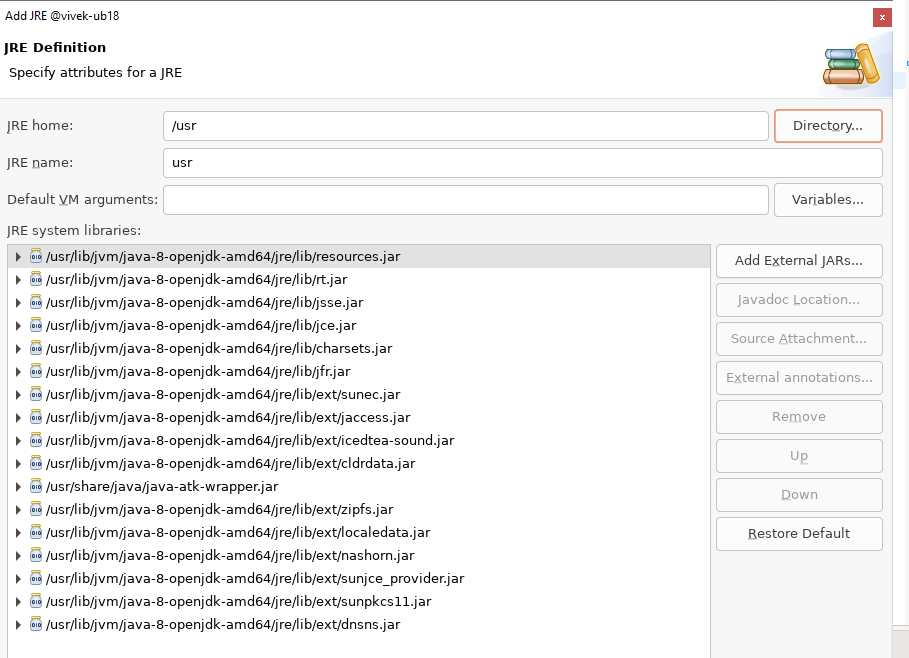
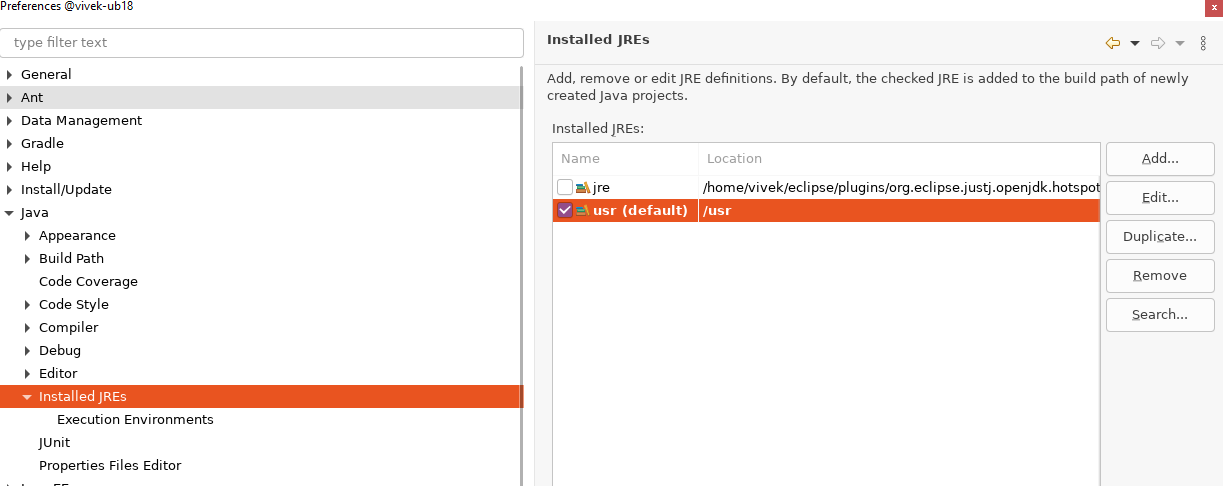
- check it to make it default as shown here
Configure Apache Tomcat 7
Again, go to Window -> Preferences -> Server -> Runtime Environments
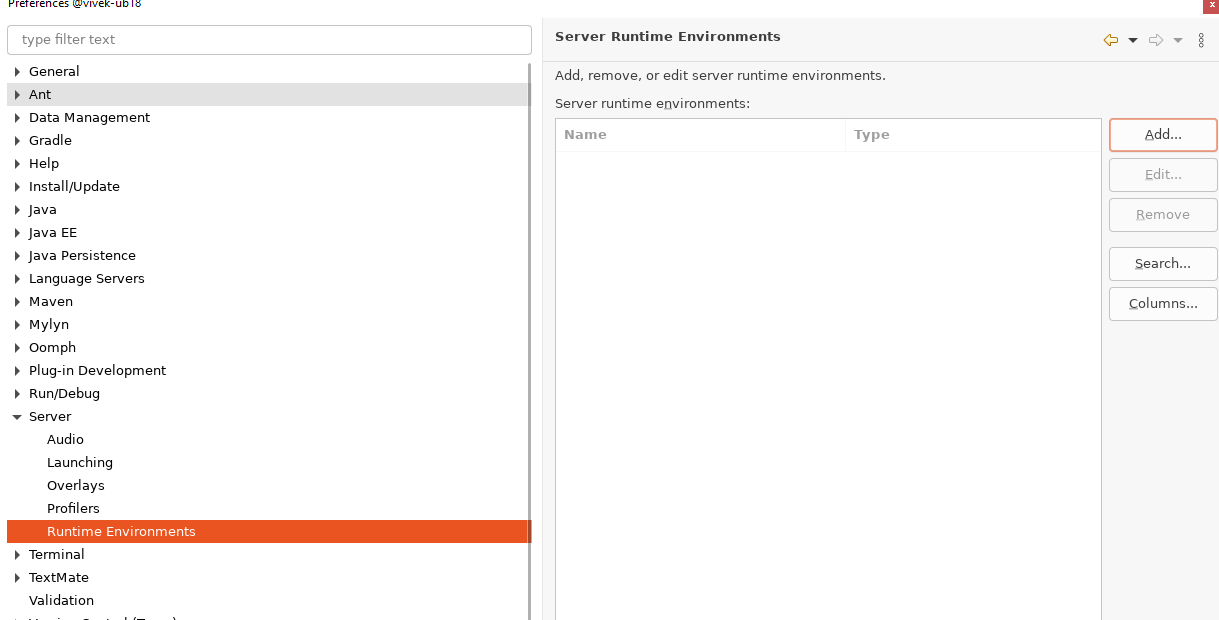
- click Add
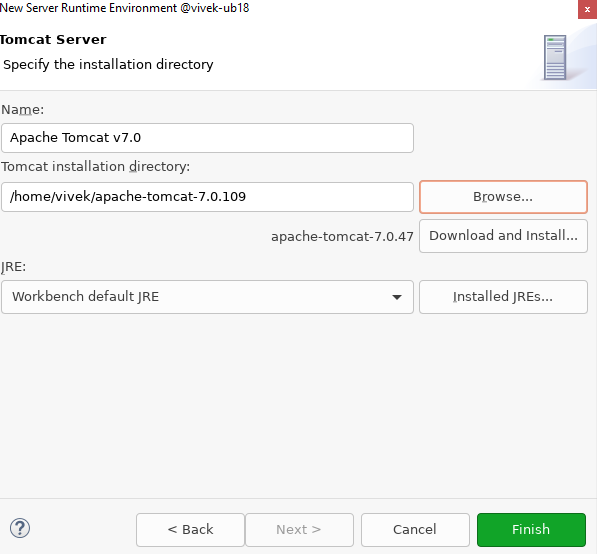
- choose Apache Tomcat 7.0
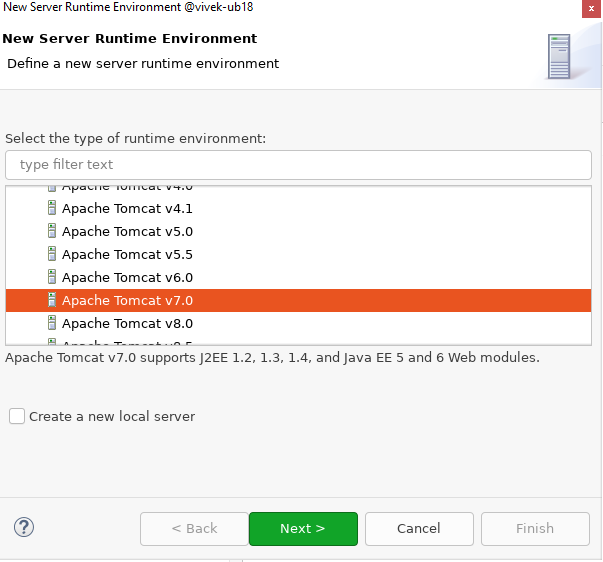
- point to the installation directory (where we extracted the tar.gz for Tomcat )
Import AltoroJ project from GitHub
- Go to File -> Import -> Git -> Projects from Git
- Choose “Clone URI” and use the following URI on the next screen: https://github.com/AppSecDev/AltoroJ/
- Proceed through the wizard without making any changes until you get to Wizard for Project import. At this point, choose to “Import existing Eclipse projects” and then continue through and finish the wizard (Taken from the documentaion at this AltoroJ page)
Run AltoroJ
- Right-click on your AltoroJ project in Eclipse’s Project Explorer
- Choose Run As -> Run On Server
- Select your Apache Tomcat v7.0 Server instance and click Finish
- AltoroJ should now come up in a built-in web browser
- Confirm that AltoroJ is properly initialized by logging in using the following credentials: Username: jsmith Password: demo1234 (Taken from the documentaion at this AltoroJ page)
Deploy AltoroJ
I wanted to automate this process of running AltoroJ whenever the machine starts. In order to do that first lets see how we can deploy the AltoroJ webapp to Tomcat 7 so we do not need Eclipse to run it
- Right-click on your AltoroJ project in Eclipse’s Project Explorer and choose Export to WAR file
- Choose the webapps directory under Tomcat 7 installation directory
Autostart Tomcat 7
- I had untarred Tomcat 7 in my home directory earlier. I moved it to /user/share/Tomcat7
:~$ mv apache-tomcat-7.0.109/ /usr/share/tomcat7 - Create the tomcat7 autostart script
sudo vi /etc/init.d/tomcat7 - Paste this below inside
#!/bin/bash ### BEGIN INIT INFO # Provides: tomcat7 # Required-Start: $network # Required-Stop: $network # Default-Start: 2 3 4 5 # Default-Stop: 0 1 6 # Short-Description: Start/Stop Tomcat server ### END INIT INFO PATH=/sbin:/bin:/usr/sbin:/usr/bin start() { sh /usr/share/tomcat7/bin/startup.sh } stop() { sh /usr/share/tomcat7/bin/shutdown.sh } case $1 in start|stop) $1;; restart) stop; start;; *) echo "Run as $0 <start|stop|restart>"; exit 1;; esac - Set proper permissions and level at which it should run it during boot
chmod 755 /etc/init.d/tomcat7 update-rc.d tomcat7 defaults - Test if it can run without errors usig
service tomcat7 <stop|start|restart>